
Needlelace is derived from the drawn thread form of embroidery and is worked by couching a double thickness of thread over the pattern lines. This thread is held in place by tiny couching stitches placed very close together and then using these threads as the framework for the lace filling stitches.

MATERIALS
| Needles- | Sharps for the couching. |
| Ballpoints or Crewel for the filling stitches. | |
| Calico- | Enough for two pieces a little larger than the pattern. |
| Threads- | These can be according to taste and suitable for the design you are |
| working. Have a variety of threads in different colours and fibres. | |
| Embroidery Scissors | |
| Tweezers | |
| Thimble- | Even if you hate wearing thimbles, use one, because it will soon |
| become your best friend. |

PREPARING YOUR PATTERN
Transfer your design on to paper, either by tracing or by photocopying,
and then go over the lines of the pattern with a soft pencil or black pen to make
sure that the lines can be very clearly seen.
Place the pattern on to either light
cardboard or two or three layers of paper and cover the whole with clear plastic
contact film.
The pattern is now ready to be tacked to the base of two pieces of calico.
I find that it is best to use the sewing machine to zig zag around the raw edges
of the calico as this stops the edges from fraying and interfering with your work.

LAYING THE FRAMEWORK
To lay the cordonnet (or framework) over the pattern lines take a length of
thread and fold it in half.
With a sharp needle and sewing cotton and commencing with the loop end of the
thread, couch the double thread over the lines of the pattern using tiny stitches
approximately 2 to 3 mm apart.
These stitches will go through the pattern and the calico but all other stitches
after the cordonnet has been laid will be on the surface of the pattern only.
Where a line and the pattern goes into the center of the design, take one thread
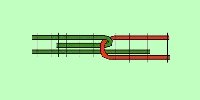
over this line and out again back to the other thread (see diagram 1)
making sure that where the thread joins up with another two threads, the thread
from the first two is wrapped around a thread from the other two so that a firm
join is achieved.
Click on the diagrams to see them against a white background
Diagram 2 |
Diagram 3 |
 |
 |
| Joining threads end to end along a straight line. | Adding a new Cordonnet thread. |
